
How to make a wedding seating chart
The short answer
Start once most RSVPs are in. Then:
- Get the floor plan and table sizes from your venue.
- Put couples and families into groups.
- Decide where the two of you sit, then put your parents and grandparents near you.
- Fill the other tables group by group.
- Check for clashes, access needs and prams.
- Send the final plan to your venue by the date in your contract, often one to two weeks before.
Step 1
Get the floor plan from your venue
Ask your venue for three things: a floor plan with the dance floor, bar and doors marked; how many tables they have and their shape; and how many people fit at each one.
Venues and hire companies mostly have round tables of 1.5 metres, which seat 8 to 10, or 1.8 metres, which seat 10 to 12. Long tables seat as many as their length allows. If you're not sure how many to fit, see how many guests per table.
Step 2
Put couples and families into groups
Seat groups, not single people. Write down who has to sit together: partners, parents with young children, a guest and their plus-one. Then the looser groups: uni friends, the netball team, work.
Leave out anyone who hasn't said yes yet: work from your replies, not your invitation list.
Step 3
Decide where the two of you sit
There are three common choices:
- A bridal table: a long table for you and the wedding party, seated along one side, facing the room.
- A sweetheart table: a small table for just the two of you. The wedding party sits with their partners.
- No table of your own: you sit at a family table, or move between tables through the night.
If you have a table of your own, put it where everyone can see it, usually at the front or beside the dance floor. Then place your parents and grandparents closest to you. See who sits at the bridal table.
Try it on a real floor plan
Draw your tables to scale and drag guests onto exact seats. Before you let go, the planner tells you what the move fixes or breaks.
Free. No sign-up. Your plan stays on your device.
Start your seating chart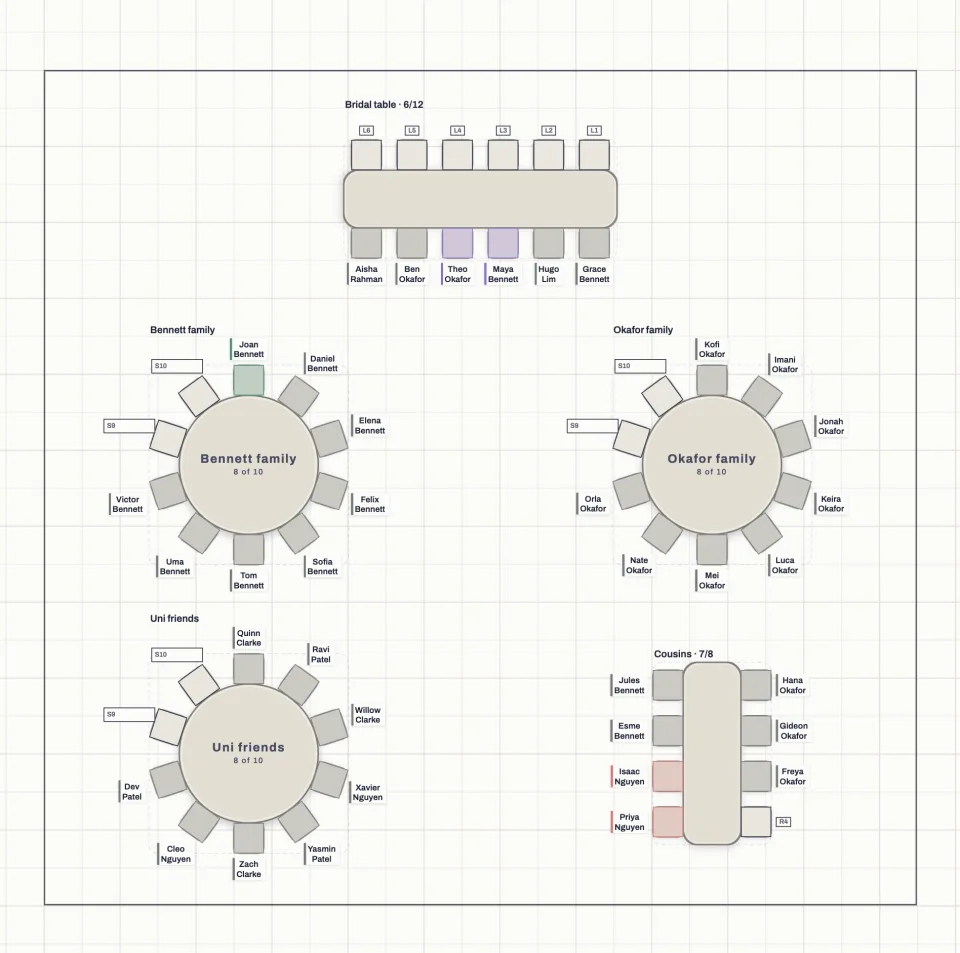
Step 4
Fill the other tables group by group
Work outwards from where you sit: close family, then extended family, then friends, then colleagues and plus-ones. Give each group its own table where you can.
When a group is too small for a table, join it to one with something in common, such as school, uni or work.
Step 5
Check for clashes, access needs and prams
- Keep apart people who don't get on, including separated parents. Give each a table the same distance from yours.
- Seat guests who use a wheelchair or walking frame near the entrance, on a path with no steps, with room around their chair.
- Seat parents with a baby near a door, with room beside their chair for the pram or a high chair.
- Tell the caterer which tables have dietary needs, not only the totals.
Step 6
Send the final plan by your venue's date
Many venues want final numbers one to two weeks before the wedding, and some want them three weeks out. Check the date in your contract. Send them the floor plan with each table's guests, and keep a copy for the board or place cards at the door.
Expect a change or two in the last week. Make them in one place, then send the venue the new version, not a list of edits.
Questions couples ask
Do we need a seating chart?
For a seated dinner, yes. The caterer uses it to serve dietary meals to the right guests, and some venues ask for one.
Do we give each guest a seat, or only a table?
A table each is enough for most weddings: guests choose their own seat at it. Assign exact seats when dietary meals are served to the seat, or when you need to keep two people apart at one table.
Is the Event Handled seating chart free?
Yes, with no account. Invitations, RSVPs and your wedding website cost A$69 once per event, GST included, when you're ready to invite your guests.